
Quick answer: Processing quail at home takes five steps: fast the birds (no feed for a few hours, water allowed), dispatch quickly and humanely, either scald and pluck or skin, eviscerate (remove the crop, windpipe, intestines, lungs and kidneys), then chill the carcasses in ice water to 40°F before bagging or freezing. Texas A&M recommends removing feed and water 4–6 hours before slaughter; Minnesota Extension scalds young birds at 125–130°F for 30–75 seconds. Skinning is faster; plucking keeps the skin for roasting. Expect a dressed carcass of about 72% of live weight.
Processing quail at home is the step many keepers dread the first time, and the one that turns a meat flock into food. Quail are small, so the job is quick once you have a setup and a routine. This guide walks through equipment, a humane dispatch, plucking versus skinning, evisceration and chilling, using Texas A&M AgriLife and University of Minnesota Extension guidance and the AVMA humane slaughter guidelines.

Before you start
- Pick the right birds. Most coturnix are ready at 6–8 weeks; our guide to when to butcher quail explains how to decide with a scale.
- Only healthy birds. Minnesota Extension says to process only healthy birds and to wait a week or two for pin-feathery birds, whose feathers are hard to remove.
- Fast them. Texas A&M recommends removing feed and water 4–6 hours before slaughter to reduce contamination. Minnesota Extension suggests no feed for 6–8 hours with water allowed. Either way, an empty crop and gut make cleaner work.
- Know the rules. Minnesota Extension notes that birds processed for your own household can be processed without inspection. Selling quail meat is different: the AVMA guidelines note that the Poultry Products Inspection Act was amended to require FSIS inspection for quail meat. Our raising quail for meat guide covers selling.
Equipment
| Item | Purpose |
|---|---|
| Sharp knife and poultry shears | Heads, feet, opening the body cavity |
| Pot or bucket of hot water and a thermometer | Scalding, if plucking |
| Large cooler or tub of ice water | Chilling carcasses |
| Clean table with a washable cover | Work surface |
| Bucket lined with a bag | Feathers and offal |
| Paper towels, hose or tap | Rinsing |
| Freezer bags or vacuum bags, marker | Packing and labeling |
| Gloves | Hygiene |
Minnesota Extension suggests clean garbage-type cans for scald and chill water and bag-lined containers for feathers and offal. Work outside or in a separate area for the messy steps, and keep the clean evisceration area apart.
Step 1: Dispatch humanely
The AVMA Guidelines for the Humane Slaughter of Animals (2024) say manual cervical dislocation is often used for on-farm slaughter of poultry, must be done by people with a high degree of proficiency, and must completely separate the vertebrae from the spinal cord without crushing. For quail, the guidelines stress proper restraint, because they are flighty birds, and training with efficacy checked. In practice for a bird this small: hold the bird calmly, grip the head at the base of the skull, then stretch and rotate firmly in one motion. Reflexive wing flapping afterward is normal, the AVMA notes. If you have never done it, learn from an experienced keeper, or use sharp shears to remove the head in one cut.
Bleed the bird head down for a minute or two before the next step. Texas A&M describes birds being “killed and bled” before plucking or skinning.
Step 2: Pluck or skin
| Factor | Plucking | Skinning |
|---|---|---|
| Speed | Slower | Much faster |
| Skin kept | Yes; better for roasting and grilling | No; meat dries faster when cooked |
| Equipment | Scald water and thermometer | Knife only |
| Mess | Wet feathers | Dry feathers |
To pluck. Minnesota Extension recommends scalding young birds at 125–130°F for 30–75 seconds, dipping head first and moving the bird up and down and side to side. A good scald lets tail and wing feathers pull out easily. Older birds, such as spent layers, scald near 140°F, which removes the outer skin layer. Pull feathers in small pinches toward the head; quail skin tears easily, so go gently.
To skin. Texas A&M describes slitting the skin down the back and skinning the bird. Cut off the wings at the first joint and the feet at the hock, pinch the skin over the breast or back, open it with the knife and peel it off like a jacket. Remove the head if you have not already.
Step 3: Eviscerate
Texas A&M lists the parts to remove: viscera including the lungs, kidneys, crop, neck and tail head (the oil gland area). A simple order:
- Cut off the head and feet if still on, and remove the neck, cutting through the joint rather than the bone.
- Loosen the crop and windpipe at the neck opening.
- Make a small cut below the breastbone, careful not to cut the intestines.
- Hook a finger inside along the breastbone and draw the organs out in one piece, cutting around the vent.
- Scrape out the lungs from against the ribs and the kidneys along the backbone.
- Cut off the tail and oil gland.
- Save the heart, liver and gizzard if you want them; Minnesota Extension says the gizzard lining peels more easily after the gizzard has cooled slightly.
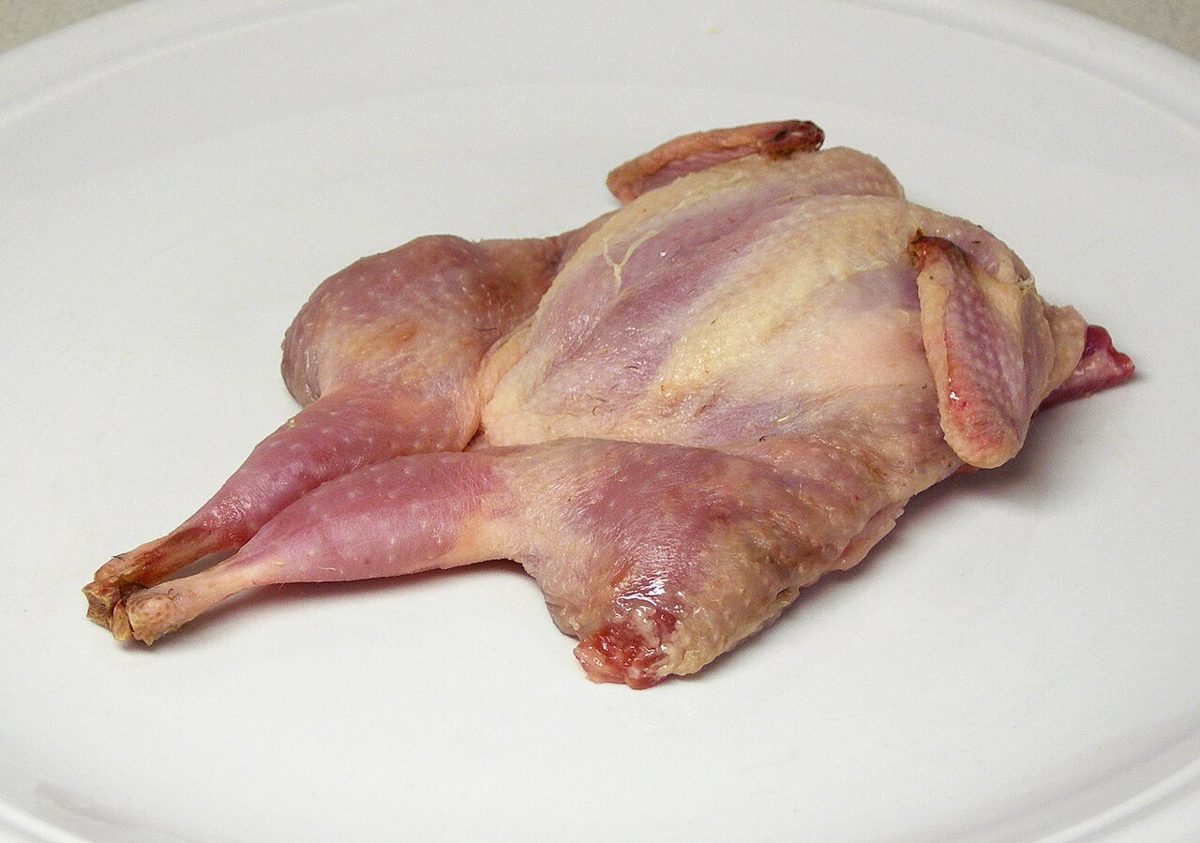
For halves or spatchcocked birds, Minnesota Extension describes a faster back-splitting method: remove the head, shanks and oil gland, then split the bird along the back and clean the cavity open.
Step 4: Chill fast
Minnesota Extension says to chill carcasses in ice and water to 40°F before packing; small birds chill in a couple of hours. Rinse each bird well, drop it into the ice water, then hang or rest the birds to drain for about 10 minutes before bagging. Do not freeze birds until they are at 40°F or below, and do not put a large batch of warm birds into a home freezer at once, Minnesota Extension adds.
Step 5: Pack, freeze and cook
Texas A&M suggests packing quail in freezer containers, covering them with water and pressing out the air; frozen that way they keep quality for 9–12 months. Label with the date. When cooking, FSIS says all poultry should reach a safe minimum internal temperature of 165°F.
How much meat to expect
Texas A&M puts the dressing percentage for quail at about 72% of live weight. A standard coturnix gives only a few ounces of meat, which is why jumbo lines are popular for the table; our jumbo vs regular coturnix comparison shows the difference.
Troubleshooting
| Problem | Cause | Fix |
|---|---|---|
| Skin tears during plucking | Water too hot or scalded too long | Lower to 125–130°F; shorter dip |
| Feathers will not come out | Scald too cool or too short; pin feathers | Re-dip briefly; wait a week for pin-feathery birds |
| Gut contents on the meat | Intestine cut during evisceration | Trim the area and rinse well; cut more shallowly next time |
| Full crop and messy gut | Not fasted | Remove feed 4–8 hours before |
| Carcasses still warm after an hour | Too little ice | Add ice until the water stays cold; chill to 40°F |
Frequently asked questions
How long does it take to process a quail?
With practice, a few minutes per bird when skinning, longer when plucking. The first few take much longer; batch the steps to speed up.
What temperature water do you scald quail in?
Minnesota Extension recommends 125–130°F for 30–75 seconds for young birds, and near 140°F for older birds.
Do I need to fast quail before processing?
Yes. Texas A&M recommends removing feed and water 4–6 hours before; Minnesota Extension suggests 6–8 hours without feed, with water allowed.
Is it legal to process quail at home?
For your own household, generally yes. Selling quail meat brings in inspection rules; check with your state agriculture department.
Should I pluck or skin quail?
Skin if you want speed or will cook in sauces. Pluck if you want to roast or grill with the skin on.
Sources
- Thornberry, F. D. Producing Quail for Home Consumption (L-5215). Texas A&M AgriLife Extension.
- University of Minnesota Extension. Home Processing of Poultry.
- American Veterinary Medical Association. AVMA Guidelines for the Humane Slaughter of Animals: 2024 Edition (PDF hosted by the American Association of Avian Pathologists).
- USDA Food Safety and Inspection Service. Safe Minimum Internal Temperature Chart.